Curvy Maps
Posted: Sat May 23, 2020 8:29 am
You can quickly add detail to an object by adding a Curvy Map (Displacement map)

Right click on the white square (a) to load an image to use.
For the cylinder and sphere I turned off Quad Caps (b) to get a better distribution of the texture on the surface.
Increase the Resolution slider to let fine details in the texture map show up.
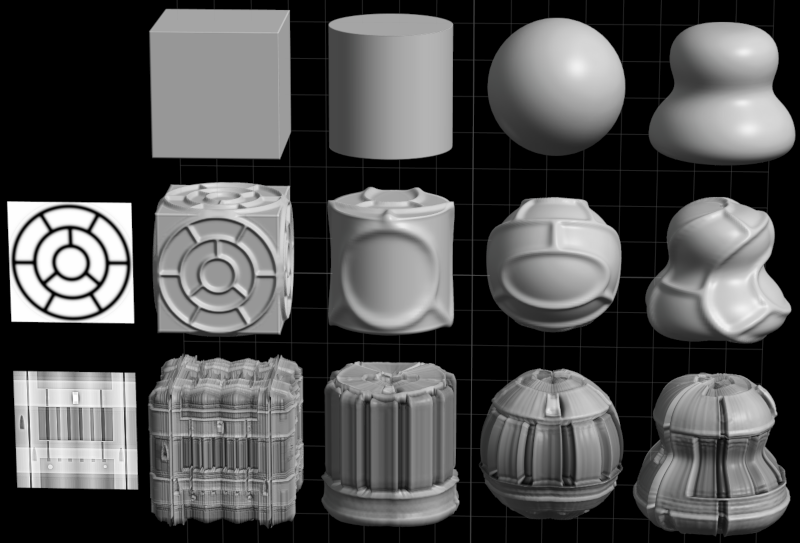
For the bottom row I added the same image as a diffuse texture by dragging on the white square labelled Diffuse Texture and selecting the same image.
These examples are technical, but you can use organic images too for a natural effect. You can even paint on the Curvy Map or edit the original object with a Curvy Map applied.
Right click on the white square (a) to load an image to use.
For the cylinder and sphere I turned off Quad Caps (b) to get a better distribution of the texture on the surface.
Increase the Resolution slider to let fine details in the texture map show up.
For the bottom row I added the same image as a diffuse texture by dragging on the white square labelled Diffuse Texture and selecting the same image.
These examples are technical, but you can use organic images too for a natural effect. You can even paint on the Curvy Map or edit the original object with a Curvy Map applied.