6.1. Smooth S
Gently smooth out a whole mesh.
For more control, use the Sculpting Smooth Tool to smooth a small part of the model.
6.2. Relax Ctrl+R
Spaces triangles evenly on the surface of a mesh, with minimal change to the overall shape.
6.3. Polish Shift+R
Evens out curvature. Subtly improves the flow of a mesh's surface.
6.4. Smooth Mask Boundary
Shifts the vertices on the edge of the masked area to a smoother shape. For example - will turn a square masked area into a more circular shape without corners.
Useful in combination with operators like Detach and Extrude.
6.5. Relax Near Mask Boundary
Relaxes only the vertices that are adjacent to the masked area's boundary.
This is useful with Smooth Mask Boundary to get an even mesh near the smoothed edge.
6.6. SLICE BY ... CURVE
Turns the current object into a Slice Action that lets you preview a slice before baking it.
Draw a Curve into the Action with the Add Curve Tool, and position the curve in front of your object.
The mesh is sliced along the curve and the inside part is masked ready for the next command.
Bake the result before using more mesh commands.
6.7. SLICE BY ... CHILD MESH
Turns the current object into a Slice Action that lets you preview a slice before baking it.
Drag another object in the groups panel to make it a child of this action.
Toggle a setting in the Action Popup to refresh the slice action.
The child slices the active object and masks the interior region.
Bake to use the newly masked region with commands like Extrude or Detach.
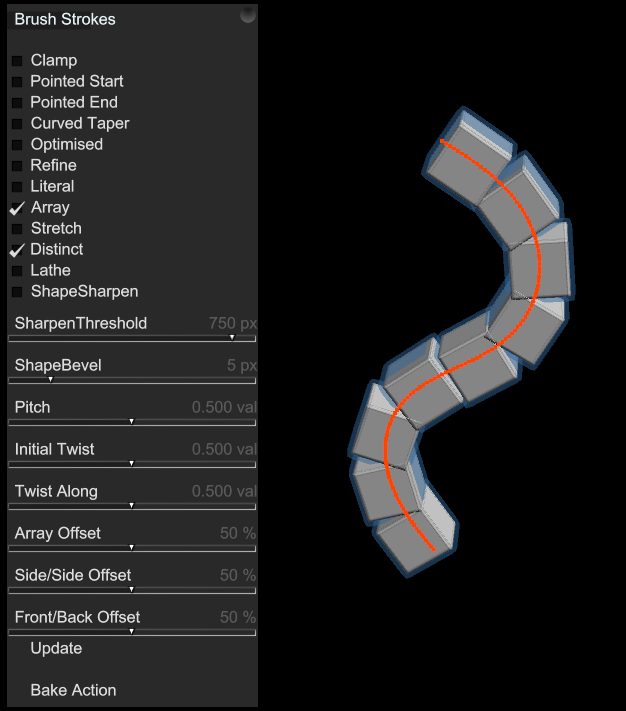
6.8. Brush Strokes
Adds a Brush Strokes Action to your mesh. This is used to deform, stretch or repeat an object along a path.
When you add Brush Strokes a popup panel apppears to vary settings. You can draw with the Add Curve Tool to make a Brush Stroke, then change the settings for different effects.
Use the Object Panel's Radius slider to change the size of each sub-part and likewise the number or parts that are laid along the Array.
Repeated parts are bent smoothly to fit the curve.
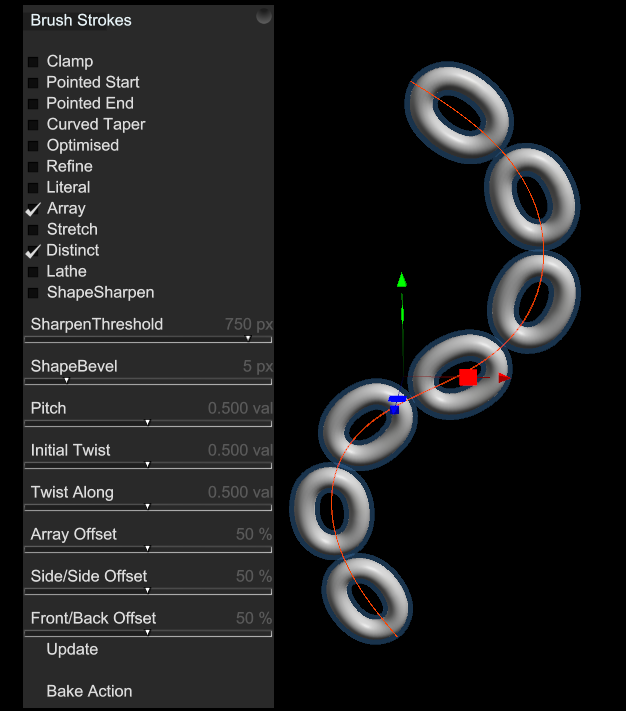
Parts remain individual and while they are positioned along the path they are not bent.
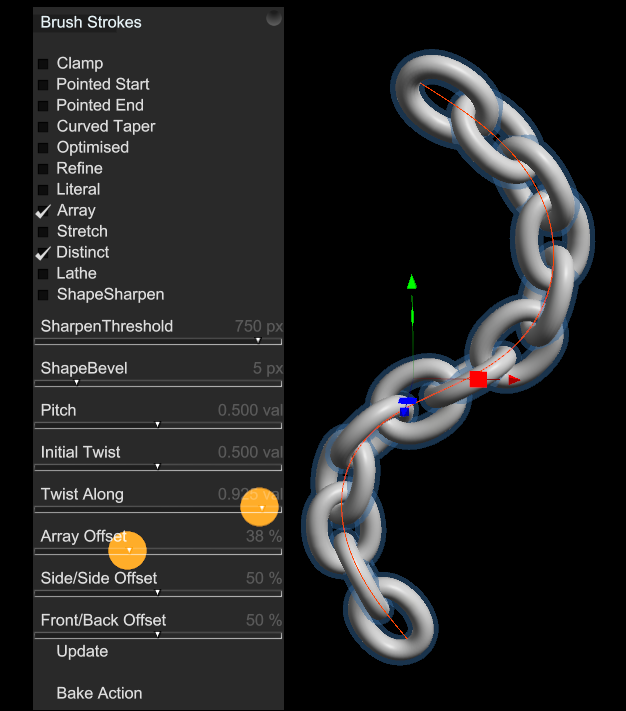
Drag the Array Offset slider down to overlap the links.
Drag the Twist Along slider up to rotate adjacent links.
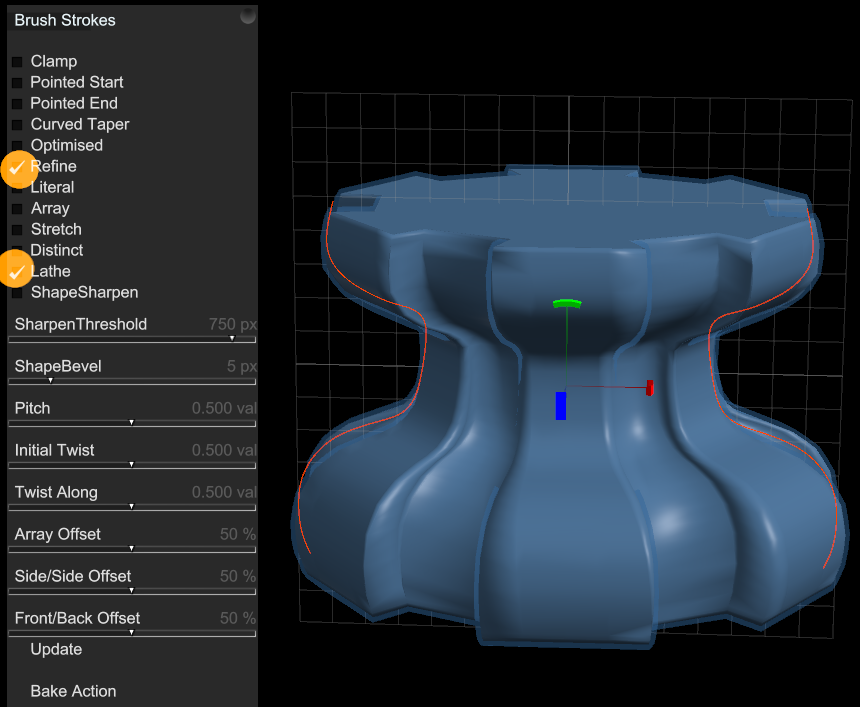
Using a cog shaped original object, and then drawing curves into the Brush Stroke with "Refine" and "Lathe" options ticked. Deforms the original object into the overall form of the Lathe curves.
Using a cube as the starting object, then using Brush Strokes with "Lathe" option makes a Lathe with the square profile of the cube.
6.9. Simplify
Simplifies the current object to match a desired triangle count compared to the original.
Opens a Reduce Action that lets you choose the type and amount of reduction.
Reduce also works on masked regions of a mesh. This is handy when you want to tweak the surface while sculpting.
6.10. Refine by Edge Length
Adds new triangles to increase the resolution of a mesh. (Also works on masked surface).
Triangles distributed evenly over the model.
6.11. Refine by Curvature
Adds new triangles to increase the resolution of a mesh.
Triangles focussed on the sharpest corners and grooves of the model. Tends to concentrate around details.
6.12. Refine Mask Gradient
Adds new triangles to increase resolution along the edge of a masked area.
This is useful in preparation to distorting or rotating the selection to make sure there is enough resolution to make the transition smooth.
6.13. Mirror
Makes the mesh symmetrical by copying Left to Right in the Front view.
N.B. The grid is slightly brighter along the centre line.
6.14. Explode
A mesh can include disconnected parts.
Explode turns those parts into separate objects in Curvy.
6.15. Join
Opposite to
Explode this command makes one mesh out of the selected objects.
The actual geometry is not affected and you can always reverse this with an "Explode".
N.B. The new joined mesh has a single material.
6.16. Extrude
The masked region is extruded in the direction of the Perspective View, to the chosen distance.
6.17. Thicken
Turns a thin sheet of mesh into a thick object with volume and an edge.
This is useful when you cut a shape out of the surface of another model to use as clothes, and then want to add a little thickness to give it an edge.
6.18. Weld to Parent
This command takes two meshes and turns them into a single surface.
To use first overlap the two meshes you want to weld.
Then make the simpler mesh a
Child of the other by dragging it's name onto the other in the
Groups Panel.
Next make sure you have the child selected (as shown above) and use "Mesh/Weld to Parent".
The result should be a seamless surface with the welded part left masked.
It is often helpful to use
Smooth or
Relax on the weld to even it out.
Finally press
SPACE to remove the mask ready to continue sculpting.
6.19. Cut from Parent
This works similarly to
Weld to Parent but the child object is effectively subtracted from the parent.
You can use this to cut holes straight through meshes, or just cut an impression of one object in another.
6.20. Delete Masked
This removes all parts of a mesh that have been masked.
6.21. Delete Inner Selection
This deletes a masked region, but leaves the boundary area intact.
(Delete Masked removes the boundary vertices too - often leaving a rough edge)
This is useful for making smooth holes in a mesh with Smooth Edge Boundary.
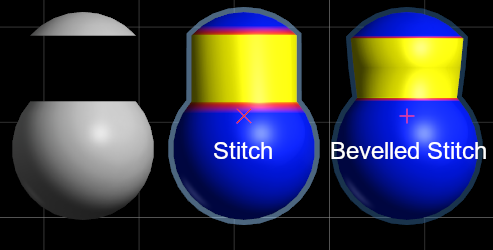
6.22. Stitch Holes
This attempts to find pairs of holes in a mesh and joins them up.
For example there are two holes either side of this U-Shape. Stitching bridges the gaps between them.
After stitching the new part of the mesh is left masked for easy smooth/relax.
N.B. If you are having trouble with "Weld" then deleting & stitching is a good fallback for smoothly joining meshes.
6.23. Bevelled Stitch
Like Stitch, but adds a small bevelled edge along the seams for a sharper more manmade look.
6.24. Cap Holes
Cap Holes finds and fills holes in a mesh, again leaving the new surfaces masked for easy smoothing.
This is useful after deleting part of a mesh, and also helpful if Curvy has accidentally left a hole in your model after another mesh command.
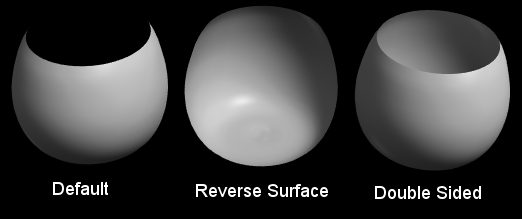
6.25. Reverse Surface
By default curvy assumes meshes are closed surfaces and only renders the outside surface.
Reverse Surface swaps inside/outside and renders the flip side of an object.
Also note the "Double Sided" checkbox which makes both sides visible at once.
N.B. Some mesh operations assume a consistant "outside" on multiple objects. Reversing an object can make it act "inside out", eg. An "add" might act like a "subtract" while using a reversed object.
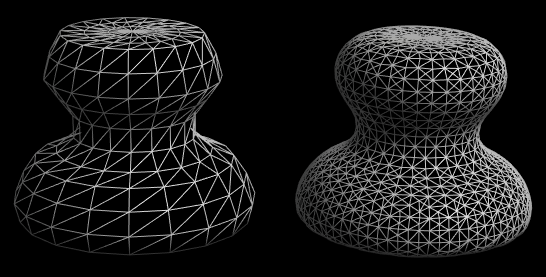
6.26. Voxel Merge All
The Voxel commands reskin a number of objects with an even grid of triangles.
This is an alternative way of compositing meshes to "Weld" & "Cut" and has its own strengths and weaknesses.
Voxel Merge All remeshes the whole scene.
The example mesh above shows the merge with two different settings for Voxel Merge Properties.
The result of a merge is often improved by using Smooth and Relax to even out the triangles.
6.27. Voxel Merge Group
Same as "Merge All" but only includes the selected group of objects.
[Drag objects onto each other in the Groups Panel to group]
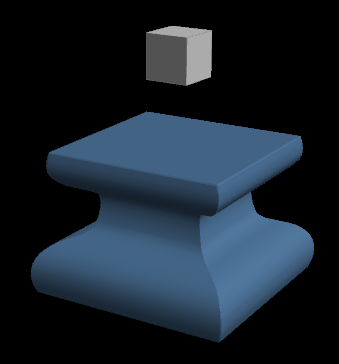
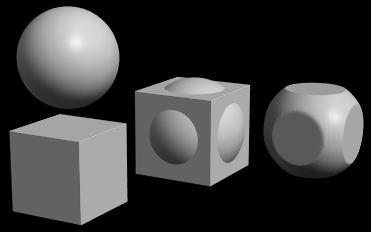
6.28. Voxel Intersect Group
Produces a mesh from the shared volumes of a group of models.
See below - only the parts of the objects that lie within both the cube and the sphere are kept.
6.29. Voxel Subtract Children
Produces a mesh from parts of the Parent that are not inside a Child object.
Essentially cuts away each of the children from the parent.
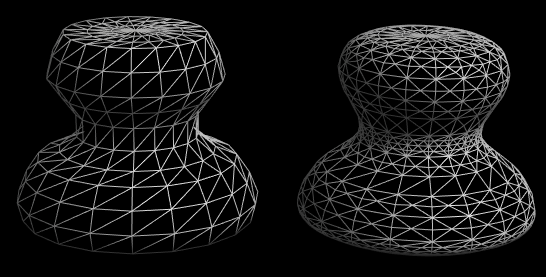
6.30. Voxel Merge Properties
Choose a preset voxel density or enter your own voxel size.
N.B. Fine/Small voxels can create extremely high triangle counts, use the lowest voxel detail possible for a smoother mesh.
Also note - if the voxels are smaller than the incoming triangles you will be able to see distinct edges/ridges in the result. In that case you can try increasing the resolution of the incoming objects to match the outgoing voxel size.
6.31. Fit to...
Adjusts the masked region of a mesh to fit a target style.
Drop to Surface (Of Visible Objects)
Pushes the selected object in the direction of the Perspective view until it touches the visible objects behind it.
Useful for wrapping fairly flat objects onto curved surfaces.
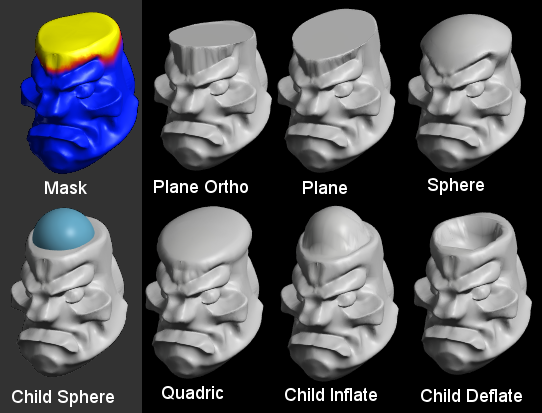
Mesh Fit Modes
e.g. Below I have selected the top of this head mesh, and added a sphere as a child object.
The results of each kind of fit are shown.
Plane Ortho
Matches the mesh to a vertical or horizontal flat plane.
Plane
Matches the mesh to a flat plane in any direction (picks the best match).
Sphere
Matches the mesh to a portion of a sphere.
Quadric
Matches the mesh to a domed or ellipsoid shape.
Child Objects (Inflate)
Pushes the mesh surface out to match the child object.
Child Objects (Cutter)
Pulls the mesh surface in to match the child object.
6.32. Convert to Normal Mesh K
Normal Meshes do not support Adaptive Subdivision. Sometimes it is useful to convert to this kind of mesh to be sure you won't add any more triangles to the mesh during sculpting.
6.33. Convert to Adaptive Subdivision Mesh J
Adaptive Subdivision Meshes divide and increase in resolution as you sculpt.
N.B. You can tell which king of mesh you have selected by the name in the bottom right of the viewport. "ASMesh" means you have an Adaptive Subdivision Mesh selected.