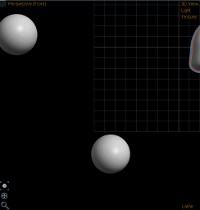
3.1. View Layout
Pick an arrangement of views to model with. By default Curvy starts with a single viewport, but for precise editing it is often handy to use 4 views at once, and for copying a reference 2 views is useful.
3.2. Panels
Toggle visibility of any of Curvy's panels.
3.3. Quick Hide Panels TAB
Hide or show all unpinned panels.
Useful for maximizing the size of the main 3D viewports, while hiding unused panels.
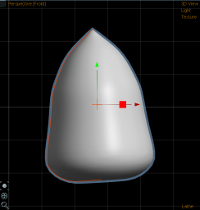
3.4. Frame Selected F
Move the view to frame the currently selected objects.
3.5. Frame All Shift+F
Move the view to frame all objects.
3.6. Reset All Views
Sets all views back to their starting position and rotation.
3.7. Wireframe A
View your mesh as edges and triangles. Handy when you need to reduce parts of the mesh during sculpting.
3.8. Grid
Draws grid lines in the 3D view to help get a sense of orientation. Also clamps curve drawing to the grid plane.
3.9. Overlay Backdrop F9
Choosing Overlay Background makes your background visible through any objects you may have drawn, this helps line things up.
3.10. Opaque Backdrop
Turning Opaque Backdrop on makes the background image cover up your models entirely. This is helpful when you have more than one viewport open and want a clear view of a reference image in one view while you sculpt in another.
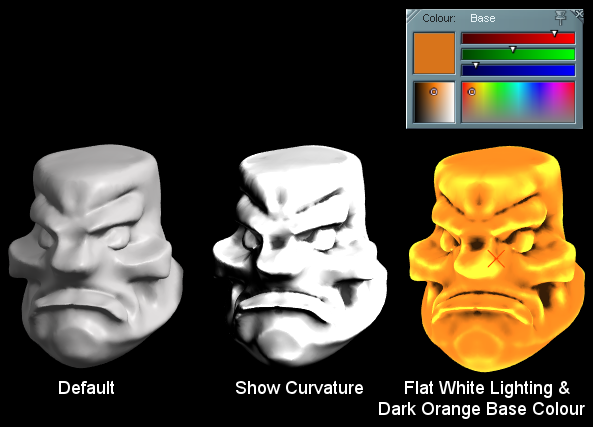
3.11. Show Curvature
For
Adaptive Subdivision Meshes this option shades your model to exaggerate curvature.
When used on a default material it will appear over-exposed and too bright. To get the most from the curvature enhancement use a flat white base lightmap, and a dark orange base colour.
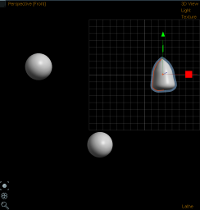
3.12. Outline Selected
Turn on to draw a thick outline around selected objects.
See below the outline is visible through other objects making it easier to locate objects in a busy scene.
3.13. Show Mask
Toggle the bright yellow&blue rendering of masked meshes. When turned off the mask will still take effect, it just won't be visible.
3.14. Show Edit Curves
Hides the curves that are usually visible on Lathe/Line/Loft objects.
3.15. Show Centre Lines
Draws a curved centre line in the middle of Lathe objects.
3.16. Expert GUI
Hides the controls in view corners. Along with
Quick Hide Panels this lets you clear the whole window for clutter free editing.
3.17. Use Shaders
By default Curvy tries to use hardware accellerated graphics to get the best rendering. If your computer can't support this Curvy reverts to a simpler rendering style.
3.18. Render Shadows
If your graphics cards supports it Curvy renders a shadow in the viewports to enhance their 3D look and help locate objects in space.
This option lets you turn off shadows.
3.19. Render Ambient Occlusion
Adds some in view shading to darken crevaces in your model and accentuate depth changes.
3.20. Use Pixel Shader 3.0
Advanced graphics cards support higher quality rendering. If you are experiencing graphical glitches you can try turning this switch off for simpler rendering.
3.21. Screenshot
You can save the Perspective view to disk using this command.
Normally the "Print Screen" button on your keyboard is enough to grab images out of Curvy - but for higher resolutions and an alpha channel use Curvy's built in screenshots.
You can pick BMP or TGA from the bottom of the save menu "Save As Type".
BMP files are saved as simple RGB, while TGA files include an alpha channel that lets you use the screenshot as a "cut-out" layer in paint programs.
Screenshot x1 saves the image at normal screen resolution. Screenshot x2 to x4 saves the screen 2 to 5 times bigger. These Hi-Res screenshots look best if AntiAliasing is disabled in your Graphics Card's options.
A Layered Screenshot saves Depth and Ambient Occlusion for the scene - these can be composited back together in a 2D paint program to make different effects.
N.B. You should setup the depth range using "View/Panels/Camera" and then adjusting the sliders for Cam Depth Near and Cam Depth Far (in the Camera Panel on the right of the screen). To show the current depth range click "Show Depth" and anything in your scene that is out of range will render as bright red or blue. Adjust the Depth sliders until the whole scene is Grey.
4.1. Paste Object Properties Ctrl+D
Paste all object properties apart from the name onto this object from the object on the Clipboard.
4.2. Paste Material Ctrl+F
Paste lightmaps, colours and the detail map onto this object from the object on the Clipboard.
4.3. Group
Turns the selection into a group, with the last selected object as Parent (More than one object required)
4.4. Ungroup
Strips the selected object of all its children.
4.5. Bake Action
Turns a Proxy object into a fully editable object, or a Proky Array into individual Proxy Objects.
4.6. Lathe Symmetry M
This is a Primitive modifier that takes effect on Lathe/Blob/Slab objects.
On Lathes it effectively mirrors the 3rd curve to the other side of curves 1 and 2 to make a symmetrical model. See
Lathe Tutorial.
4.7. Hide H
Toggle hiding this object and its children
4.8. Align
Arrange several objects to line up in an axis
4.9. Distribute
Arrange several objects equally along an axis
4.10. Rotate
Simply rotate by 90 degrees on an axis
4.11. OBJ MIRROR
Flip/Reverse an object along an axis.